안드로이드(Android) 문자열 리소스 <string>
안드로이드에서는 여러 리소스들을 /res/ 밑에서 관리한다.
문자열 리소스는 기본적으로 /res/values 밑에 strings.xml에서 관리된다.
필요한 문자열을 strings.xml에 등록하고, layout과 Activity에서 리소스를 사용해보자.
1. res(리소스)에 String 문자열 등록하기

strings.xml
|
<?xml version="1.0" encoding="utf-8"?> <resources><string name="app_name">HelloAndroid</string> <string name="action_settings">Settings</string> <string name="hello_world">Hello world!</string> <string name="sample1">Hello~! Friends~!</string> <string name="sample2"><i>Hello~!</i><b>Android~!</b></string> <string name="sample3">Name : %1$s, Score : %2$d</string> </resources> |
sample1 : Hello~! Friends~! 라는 String을 리소스로 등록했다.
sample2 : Hello~! 는 기울기를 넣고, Android~!를 볼드 처리한 String을 리소스로 등록했다.
sample3 : 첫번째 인자(%1)은 문자형($s), 두번째 인자(%2)는 숫자형($d)로 매핑할 수 있는 String을 리소스로 등록했다.
(app_name, action_settings, hello_world는 최초 프로젝트 생성시 등록되어 있다.)
2. layout의 xml에서 String 리소스 불러오기
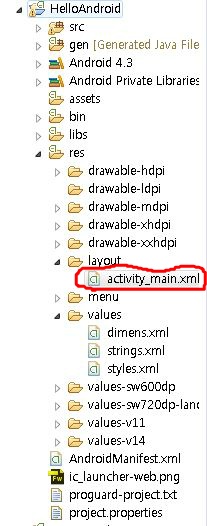
안드로이드의 화면은 /res/layout 밑에 xml 파일로 정의되어 있다.
프로젝트 생성시 최초 화면은 activity_main.xml 로 지정되어 있다.
activity_main.xml에 등록한 String 리소스를 불러와 화면에 출력해보자.

|
<RelativeLayout xmlns:android="http://schemas.android.com/apk/res/android" xmlns:tools="http://schemas.android.com/tools"android:layout_width="match_parent" android:layout_height="match_parent" android:paddingBottom="@dimen/activity_vertical_margin" android:paddingLeft="@dimen/activity_horizontal_margin" android:paddingRight="@dimen/activity_horizontal_margin" android:paddingTop="@dimen/activity_vertical_margin" tools:context=".MainActivity" > <TextView android:id="@+id/textView1" android:layout_width="wrap_content" android:layout_height="wrap_content" android:text="@string/sample1" /> <TextView android:id="@+id/textView2" android:layout_width="wrap_content" android:layout_height="wrap_content" android:layout_alignLeft="@+id/textView1" android:layout_below="@+id/textView1" android:layout_marginTop="15dp" android:text="@string/sample2" /> <TextView android:id="@+id/textView3" android:layout_width="wrap_content" android:layout_height="wrap_content" android:layout_alignLeft="@+id/textView2" android:layout_below="@+id/textView2" android:layout_marginTop="15dp" android:text="@string/sample3" /> </RelativeLayout>
|
- <TextView> 가 3개 등록되어있다.
- 첫 번째 <TextView>는 id가 textView1 이며, (android:id="@+id/textView1") string 리소스중 name이 sample1의 문자열을 가져온다.(android:text="@string/sample1")
-> textView1 : Hello~! Friends~!
- 두번째, 세번째 <TextView> 도 마찬가지로 id는 textView2, textView3 이며, stirng 리소스중 name이 sample2, sampl3의 문자열을 가져온다.
-> textView2 : <i>Hello~!</i><b>Android~!</b>, textView3 :Name : %1$s, Score : %2$d
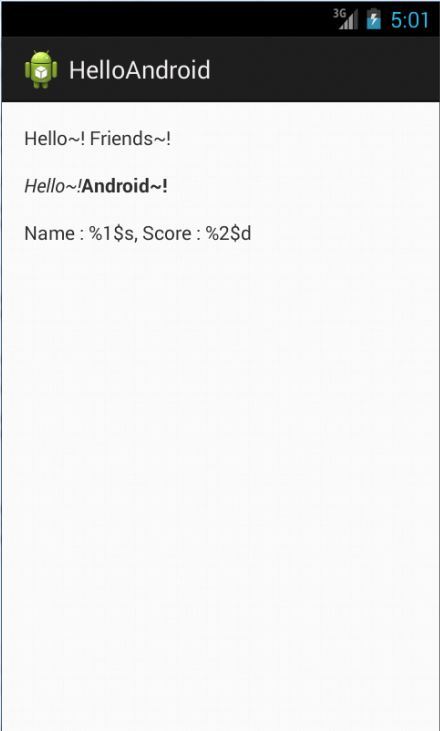
프로젝트를 실행시켜보자.

-strings.xml 에 등록된 문자열 리소스들을 출력한다. <i></i> 와 <b></b> 등 HTML의 문법이 적용되지만,
%1$s, %2$d 는 Activity에서 Formatting으로 매핑을 해줘야 한다.
3. Activity.java에서 리소스 불러오기
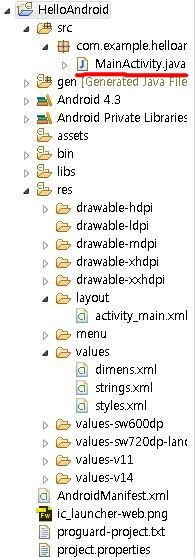
MainActivity.java에서 리소스에 등록된 string 문자열을 불러와서 사용해보자.

|
public class MainActivity extends Activity { @Override protected void onCreate(Bundle savedInstanceState) { super.onCreate(savedInstanceState); setContentView(R.layout.activity_main); // string 리소스중 name이 sample1의 문자열을 getString()으로 가져온다. String sample1 = getString(R.string.sample1); // 리소스에서 id가 textView1인 TextView를 가져온다. // sample1 을 textView1 에 적용한다. TextView textView1 = (TextView)findViewById(R.id.textView1); textView1.setText(sample1); // string 리소스중 name이 sample2의 문자열을 getText()로 가져온다. CharSequence sample2 = getText(R.string.sample2); // 리소스에서 id가 textView2인 TextView를 가져온다. // sample2을 textView2 에 적용한다. TextView textView2 = (TextView)findViewById(R.id.textView2); textView2.setText(sample2); // string 리소스중 name이 sample3의 문자열을 getString()으로 가져온다. // name 이라는 String에 html형식으로 인코딩한 "Hyeon" 문자열을 저장한다. // String.format 을 사용하여 sample3 에 name과 90을 인자로 대입한 결과를 resultText에 대입한다. String sample3 = getString(R.string.sample3); String name = TextUtils.htmlEncode("Hyeon"); String resultText = String.format(sample3, name, 90); // 리소스에서 id가 textView3인 TextView를 가져온다. // resultText를 textView3 에 적용한다. TextView textView3 = (TextView)findViewById(R.id.textView3); textView3.setText(resultText); } }
|
- String 문자열은 getString() 으로 리소스에 등록된 string 문자열을 가져온다.
- sample1 문자열을 가져와서 TextView1 에 셋팅했다.
- getText()의 경우 리소스에 등록된 문자열의 태그 속성까지 가져온다. 그리고 반환값은 String이 아닌 CharSequence 이다.
- getText()를 사용하여 sample2의 <i></i> <b></b> 속성까지 가져와서 TextView2에 셋팅했다.
- getString()으로 가져온 sample3 에 String.format() 을 사용하여 인자값을 매핑해준다. (%1$s, %2$d)
- formatting한 결과를 resultText에 대입한 후 TextView3에 셋팅한다.
- 레이아웃에서 그대로 불러온 것과 달리 (%1$s, %2$d) 에 데이터가 매핑되어 출력된다.
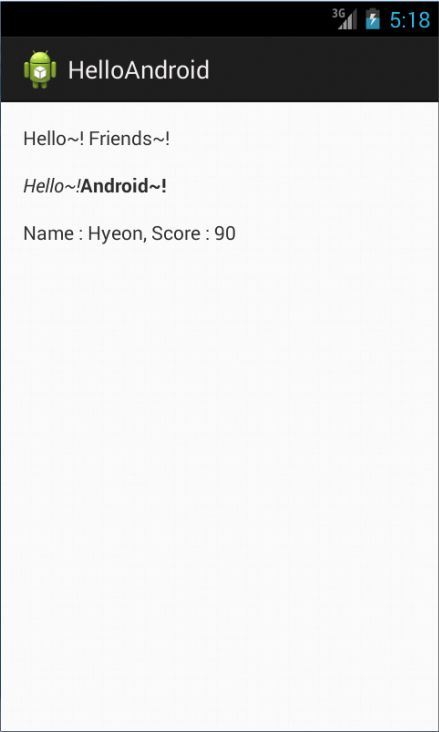
프로그램을 실행해보자.

- getText()로 불러온 sample2가 HTML 태그까지 적용되어 실행된다.
- sample3에 데이터가 매핑되어 출력된다.

안드로이드(Android) 이미지 리소스 drawable
출처: https://hyeonstorage.tistory.com/153 [개발이 하고 싶어요]
'개발 > Adroid' 카테고리의 다른 글
| [android] 20분만에 채팅App만들기 -Firebase(1) (0) | 2019.10.26 |
|---|---|
| [android] PagerSlidingTabStrip (0) | 2019.10.21 |
| [android] google AdMob에 가입하기 (0) | 2019.10.14 |
| [android] PROGUARD사용시 주의점 (0) | 2019.10.08 |
| [android] Audio AlbumArt 가져오기. (0) | 2019.10.07 |

댓글